How to build faculty newsletters
The following information explains the roles, process, procedures and standards for creating a Faculty Newsletter. These emails are built using Luminate CMS and the email module in Luminate Online.
If you need assistance, please contact:
- Mark Koopman (mkoopma@uwo.ca or x80563)
|
|
Process
Submit e-communications request form
- To start the process, the Project Lead needs to submit the E-Communications Request Form at www.westernconnect.ca/ecomm_request.
- When submitting a request, please refer to the External Communications Calendar and keep in mind the following points from the Mass E-Communication Policy:
- Requests for mass emails, which include newsletters, will be accepted no more than 90 days in advance and no less than 3 weeks in advance.
- Constituents can receive a maximum of one mass email from Western in a 48-hour period and a maximum of six mass emails per month.
- The Business Specialist will review all requests in terms of compliance with the Mass E-Communication Policy and availability on the External Communications Calendar and email the Project Lead regarding the status of the request.
- Authorized mass e-communications are posted to the External Communications Calendar</a >.
Coordinate data
- The Project Lead is responsible for coordinating the data with the Information Management & Systems Team in Advancement Operations.
- The process is initiated when the Project Lead submits the E-Communications Request Form.
- When the request is received, an Analyst will contact the Project Lead to discuss the data criteria if s/he has questions. Alternatively, the Project Lead may email avimteam@uwo.ca directly with questions or clarifications.
- Once the data criteria is set, the Analyst will extract the data from Contributor Relations and load it into Luminate Online.
- Data should be refreshed each time a newsletter is sent.
Organize content
- The Project Lead is responsible for organizing all newsletter content including:
- Determining the newsletter’s line-up with input from Project Partners and Contributors if applicable.
- Ensuring all articles, events, etc. in the line-up exist on the web. If not, making certain they are created in accordance with the newsletter’s timelines.
- Collecting links for articles, events, etc.
- Writing headlines and lead-ins for newsletter.
- Collecting images for newsletter.
- In addition, the Project Lead is also responsible for formatting all images for the newsletter. Appendix B: Preparing images of this manual provides instructions for this task.
Build web version of newsletter in Luminate CMS
- A newsletter content type has been created in Luminate CMS for faculty newsletters.
- Please refer to the Procedures section.
Test web version of newsletter
- First, review the online version of the newsletter yourself and make any necessary edits in Luminate CMS.
- Next, send the URL for the newsletter to your Project Partners (and Contributors if applicable). Instructions are found in the Procedures section.
- Remember, testing with Project Partners must start a minimum of 2 business days before the review process </strong >or five working days before the scheduled send to take into account the 2 business day minimum required for the review process.
- Project Lead’s and Partners’ tasks when testing include:
- Copy editing (grammar, spelling, fact checking)
- Link checking
- Content feedback (i.e. order of stories, photos being used, etc)
- Layout/format review (i.e. line spacing, font size, etc)
- Proofing pages linked to and alerting authors of any errors
- Contributors’ tasks when testing include:
- Reviewing content submitted for factual or grammatical errors and dead or inaccurate links
- Approving images
- Flagging any issues of which the Project Lead & Partners may not be aware
- Testing with Contributors is recommended but not mandatory.
- Make edits submitted by Project Partners and Contributors to the newsletter in Luminate CMS.
Build email newsletter
- Using the HTML code generated for the newsletter in Luminate CMS, build an email version of the newsletter in Luminate Online.
- Please see Procedures section.
Review email newsletter
- The review copy of the newsletter MUST be sent a 4 business days before the newsletter is to be sent to ensure Reviewers have 2 business days to review and that the newsletter is approved a minimum of 48 business hours before the scheduled send date/time.
- Reviewers’ tasks include:
- Checking links
- Commenting on formatting issues that arise because of different email clients
- Flagging areas of caution or concern from the broader University perspective
- Instructions for sending review messages are found in the Procedures section.
Approve email newsletter
- Reviewers will provide feedback to the Project Lead only if a technical or institutional issue is encountered.
- The Project Lead must approve the email in Luminate a minimum of 48 hours before the scheduled send date/time.
Evaluate
- The Business Specialist will pull the message performance and click-through reports for the newsletter one week after it was sent. These results will be saved in extwork$ > Online Engagement > Email Metrics > Your Faculty.
- The message performance report provides high level information about:
- the delivery of the message
- hard bounces (i.e. bad email address)
- soft bounces (i.e. email address exists but for some reason the message was undeliverable because the recipient was over quota or her server was down, etc)
- open rates (note: likely slightly higher than what is indicated as Luminate only recognizes actual opens, not people viewing the message in their reading pane)
- recipient click-throughs (i.e. the number and percentage of recipients who clicked at least one link in the message)
- unsubscribe rates
- The clickthrough summaries provide the total number of times that any recipient of that delivery clicked any link in the message; multiple clicks on the same link are counted. The links are sorted from most to least popular. Click-through summaries are intended to help the Project Lead determine which stories were of most interest to their readers and can be used as a content guide for future newsletters.
Procedures
Access Luminate Online
- Log into the Luminate Administrator at westernconnect.ca/admin.
- Once logged into Luminate you will see the Luminate admin homepage
Create a new web newsletter
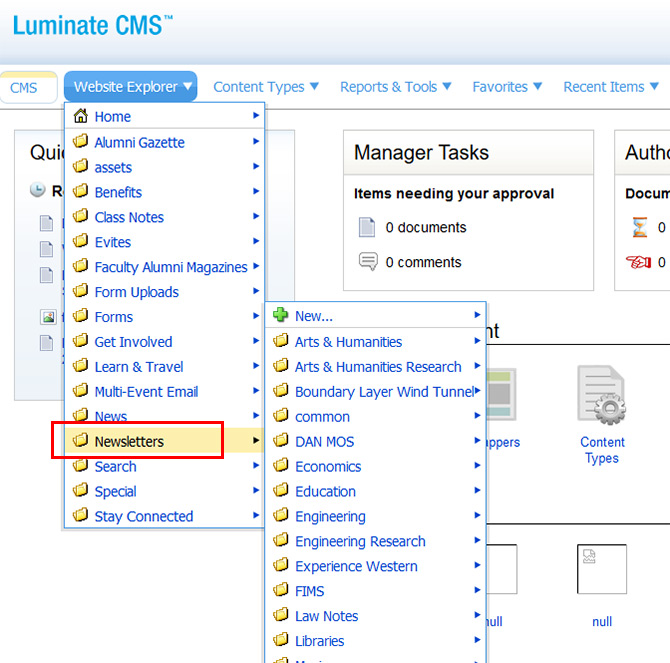
- Navigate to CMS by clicking Content in the top menu and select CMS from the drop-down
- OR use the blue drop-down menu in the top right corner

- Make sure you are on the CMS for the the Alumni website by checking the URL that displays in the top right of your screen.
- If it does not say www.alumni.westernu.ca, click the hyperlink and select www.alumni.westernu.ca.
- Navigate to Website Explorer >> Newsletters >> (Your Faculty Folder)
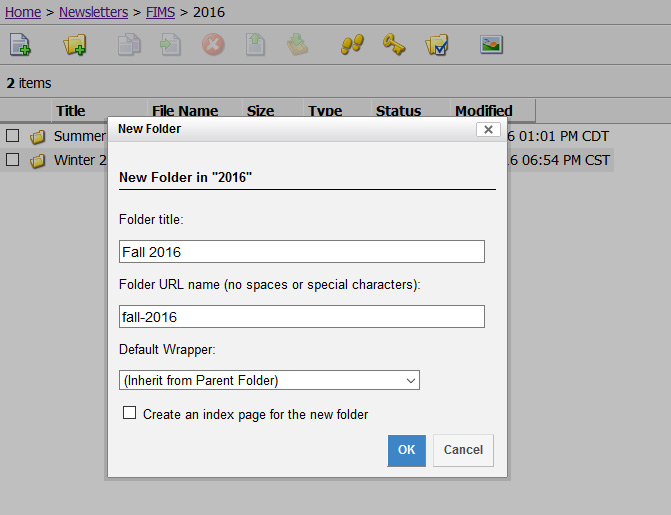
- Create a new folder by clicking on the (
 ) icon
 - Name the folder using the issue date (i.e. “Spring 2015” OR “May 2015”). This folder is where you will create your newsletter and save all its associated images.
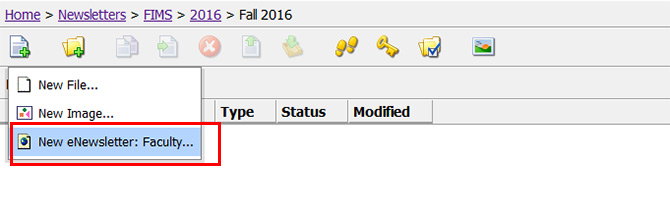
- In the new folder, create a new newsletter by clicking on the (
 ) icon and selecting New eNewsletter: Faculty…
- You are now on the Enter Properties page of the wizard for inputting faculty newsletter content
- Enter an Issue Date (same as what you called the folder).
- The File Name will automatically update.
- Select your faculty from the drop-down list.
- Select Not Yet for Is Current Issue section.
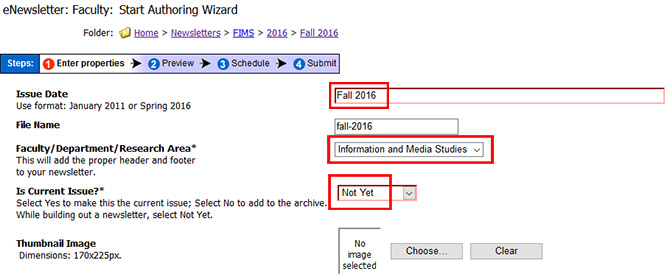
- Click orange Publish button at the top to save.
Populate web newsletter content
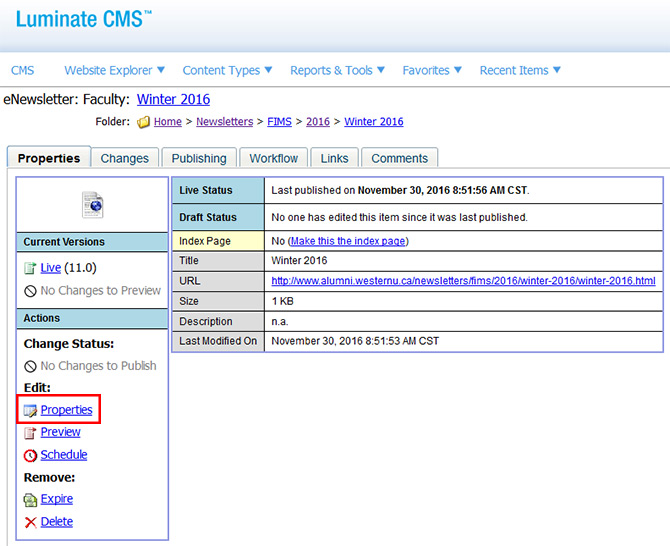
- After clicking on the orange Publish button, you will be re-directed to the Status page for the issue of newsletter you are working on
- Using the left navigation, click the Properties link to get back into the wizard
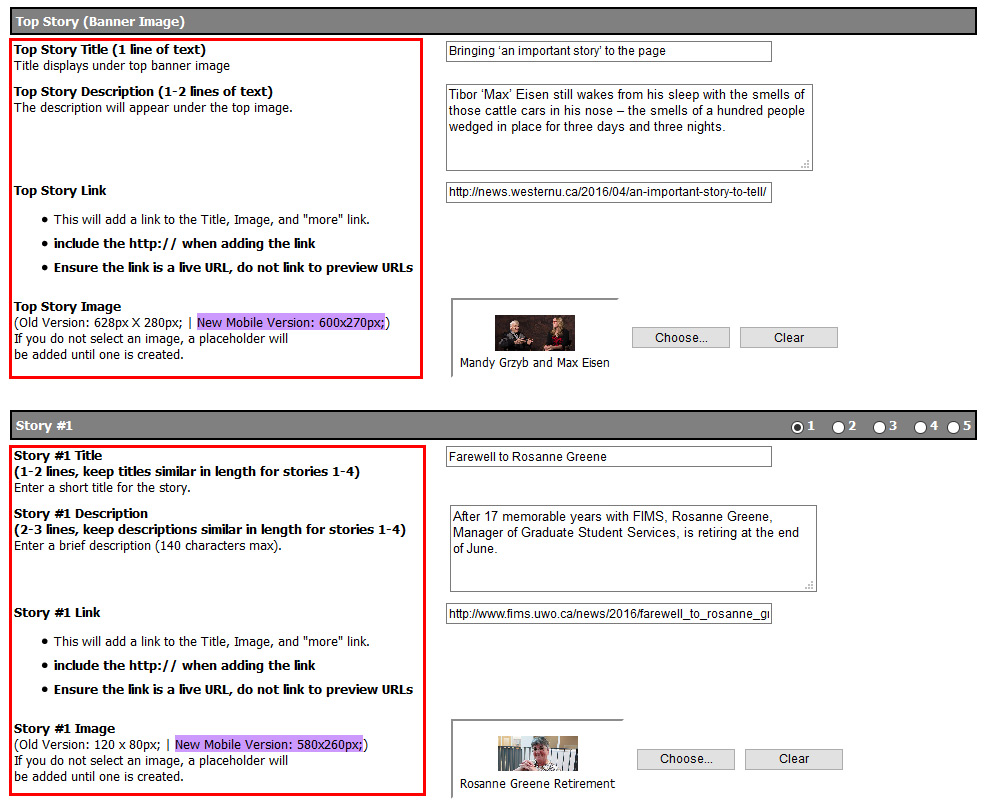
- Back on the Enter Properties page of the wizard, complete the fields for each section of the newsletter
- Utilize the field hints to the left of the fields if you require clarification on what a field is for
- At any time, you can click the Preview option at the top to view how the eNewsletter is looking; when you want to , just click the Enter Properties option from the same menu to the properties section
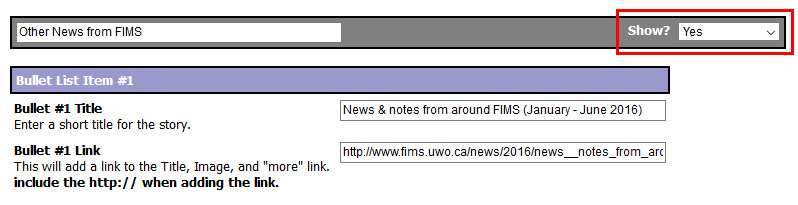
- Some sections will only display if you set them to do so using the Show? fields
- Set these fields to Yes or No
- When done editing, click the orange Publish button at the top
- When adding images to the newsletter in the wizard, remember:
- You can add a new image to the folder of the issue you are working on by selecting the new item icon () and completing the fields for the new image
- For story images you only need to fill in the Title, Upload Image, and Alt Text fields.
- Ignore the Caption, Custom Image Size, Provide Link and Video Slide fields!
- It is not enough to click on or highlight the image you want included in the newsletter, make sure the image title appears in the Selected Links section. If it does not, drag and drop the image from the centre column to the Select Links column.
- You can add a new image to the folder of the issue you are working on by selecting the new item icon (
Mobile version
- In Winter 2016 the Faculty Newsletters received a template redesign, this new design enables the newsletter to “stack” to one column (in contrast with two columns on desktop) on mobile devices making it easier to read on smartphone devices such as iPhones and Android devices.
- If you are building a mobile faculty newsletter, remember to set the template field at the bottom of the authoring wizard to Full Newsletter – Mobile Version and ensure you are using the appropriately sized images</strong >. If building a standard newsletter, leave field as is.

Test web newsletter
- On the status screen, click on the live URL
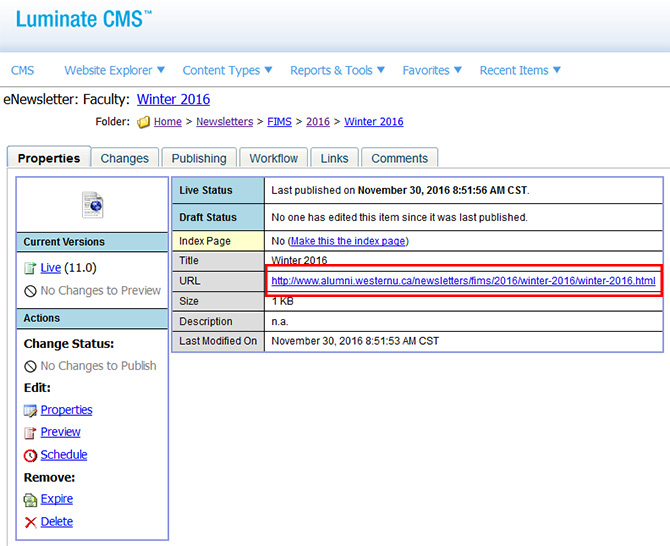
- Proof read the online version of the newsletter yourself.
- If you need to make changes, click the Back button in your browser and then select Properties to access and edit the newsletter. Remember to click the orange Publish button to save your updates.
- In your own email client, send your Project Partners & Contributors (if applicable) a note with the URL for the online version of the newsletter so they can test it.
- In Luminate CMS, make the edits recommended by your Project Partners and Contributors. The eNewsletter should now be very close to final.
Copy HTML code
- Return to the live version of the Newsletter by clicking on the live URL on the status page.
- While viewing the live version of Newsletter, right mouse click on the background. Select View Page Source.
- Starting at <!– **********BEGIN COPY FOR CONVIO***************–>, select and copy code ending at <!–END COPY FOR CONVIO–>
- Return to Luminate CMS by selecting the Back button in your browser
Create email newsletter
- Select Luminate Online from Luminate CMS drop-down in upper right corner

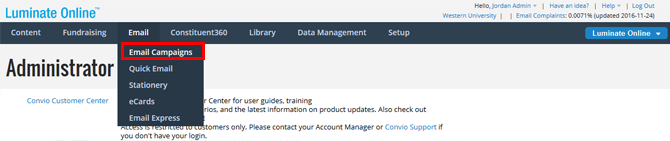
- From the top navigation bar, select Email >> Email Campaigns
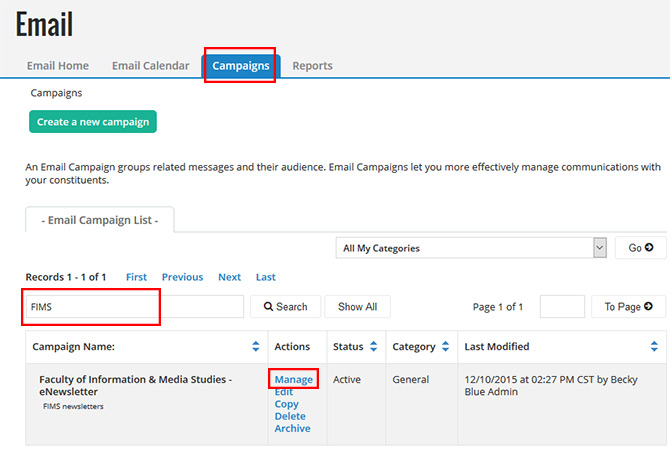
- Select the Campaigns tab
- Search for your faculty newsletter campaign
- Click Manage in the Actions column next to your faculty newsletter campaign
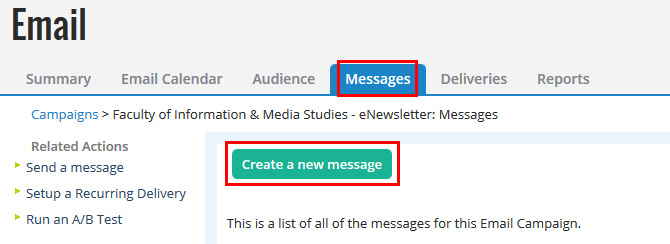
- Select the Messages tab
- Click Create a new message button
- On the Message Information screen:
- Enter a name for the new message, ensuring to include the date (i.e. FIMS eNewsletter – Winter 2016)
- Enter purpose or description for the new message
- Set the message type to Newsletter
- Leave tentative schedule date blank
- Leave “Include this message in the message list:” unchecked
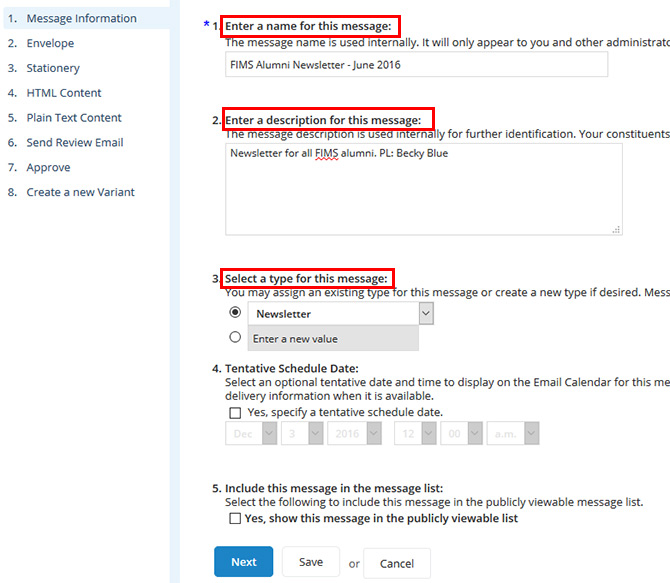
- Click the Next button at the bottom of the page
- NOTE: After a message has been created, it can also be accessed for editing on the Email Home page ( Email >> Email Campaigns </strong >) under Draft Messages. Accessing a message from the Email Home page saves you from delving into the Campaigns and Messages tabs to find your newsletter.
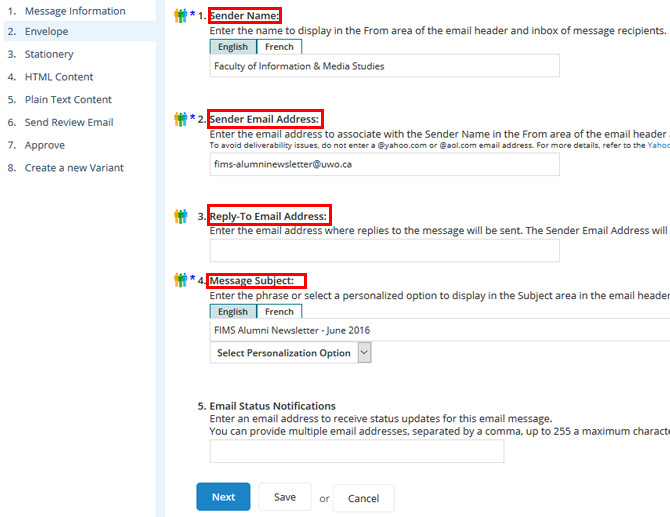
- On the Envelope screen:
- Sender’s Name: use the full name of your Faculty (ex. Faculty of Health Sciences)
- Sender’s Email Address: use the Western email address which appears at the bottom of your Faculty’s newsletter template and at which you want to receive replies. This includes bounce backs (i.e. out of office messages, etc).
- Reply to email address: if you wish to use one sender email but have the replies go to another email enter a separate email here. If this is left blank the sender email address will receive replies. This includes bounce backs (i.e. out of office messages, etc).
- Message Subject: include the name of the newsletter as well as the month and date of the issue (ex. eNewsletter – February 2010 OR February 2010 eNewsletter)
- Click the Next button at the bottom of the page.
- On the Stationery screen, select Faculty Newsletter – CMS version</strong > if building a non-mobile faculty newsletter OR</strong ></strong >
Mobile WAN/Faculty Stationery if you are building a mobile faculty newsletter

- Click the Next button at the bottom of the page
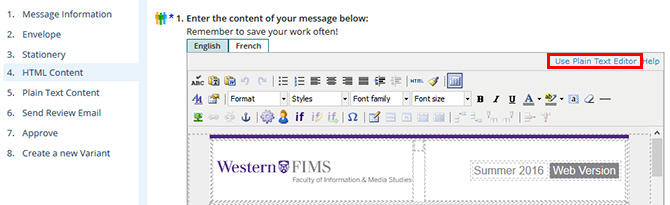
- On the HTML Content screen:
- Click the Use Plain Text Editor link in top corner of the WYSIWYG editor
- Paste the HTML code you copied into the plain text editor
- Click the Next button
- On the Plain Text Content screen:
- Enter “View (your newsletter name) on the web at (insert URL for web version).”
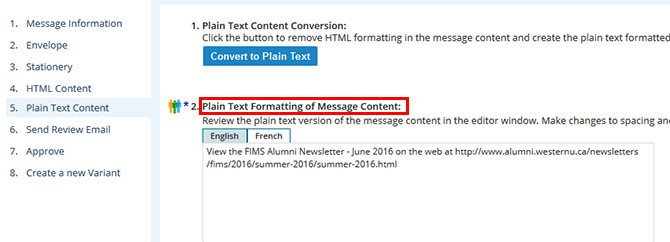
- Click the Next button at the bottom of the page
Review email newsletter
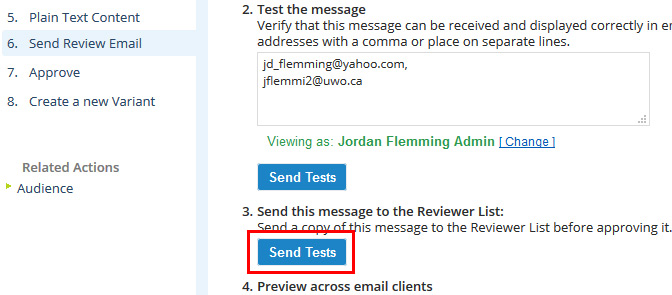
- On the Send Review Email screen under 2. Message Testing
- Click the tick box next to Send a separate plain-text copy to my test email addresses so that you receive both the HTML and the plain text version of the newsletter.
- Click the first Send Tests button
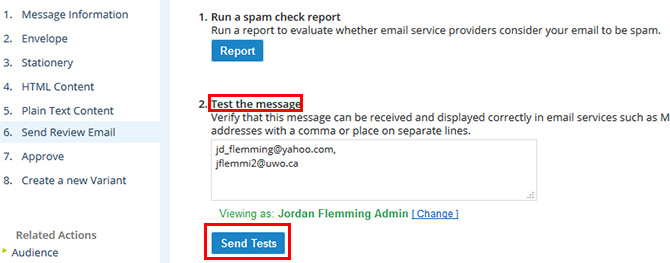
- If the newsletter looks good in your own email client (and it should):
- Send a note from your own email client to reviewers@uwo.ca to let the Reviewers know that they will shortly be receiving a copy of the newsletter.
- Be sure to indicate the date and time by which you require feedback.
- Return to the Send Review Email screen and click the Send Tests button under Send this message to the Reviewer List
Incorporate reviewer feedback
- Any changes recommended by Reviewers MUST first be made to the web version of the newsletter in Luminate CMS.
- Once the edits are made, copy the HTML code from the web version. See Step 5 if you need assistance.
- Return to the Email module in Luminate Online. See step 6 on page 13 if you need a refresher.
- Your faculty newsletter will now appear on the Email Home page under Draft Messages. Click Edit in the Action column beside it. This is a fast and easy way to access your newsletter as it saves you from navigating through the campaigns.
- Go to the HTML Content screen and replace the existing HTML code with new HTML code from the finalized web version of the newsletter. Click the Save button.
Approve newsletter
- Go to the Send Review Email screen and send yourself one final test of the newsletter.
- If everything is okay, proceed to the Approve screen and click the Approve button.
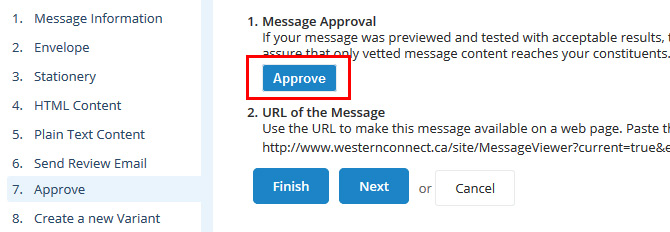
- The newsletter must be approved in Luminate a minimum of one working day before the scheduled send date.
Index the newsletter
- Return to Luminate CMS and access the current issue of your newsletter
- Upload a thumbnail of the newsletter sized at 170px X 225px
- On the Properties page of the current issue, change Is Current Issue? from “Not Yet” to “Yes”
- Now access the previous issue of your newsletter. On its Properties page, change Is Current Issue from “Yes” to “No”
These reviewers can be notified of messages for review at email.reviewers@uwo.ca.